Modifying Caption Text
Use this dialog to change settings for caption text on your document. Do one of the following to access this dialog:
- Double-click the shape.
- Right-click the shape, then select Modify.
- Select the shape, then select Shape Menu > Modify.
- Select the shape, then press Ctrl+E on your keyboard.
CAUTION: Make sure the Caption Text box size is large enough to contain all of the text. If it is not, some of the text may be cut off when you print. This is particularly important when you are preparing Caption Text areas for merge printing. Since the text box sizes are fixed in your design, you must make sure that the largest text entry from your database will fit in the text box.
There are two different text tools in Scantron DesignExpert software: Text and Caption Text. Both text tools create text fields but each has unique features that you can use for different purposes in your form design.
| Text |
Caption Text |
|---|---|
|
Text is used for long text passages such as instructions or survey questions. It has the following controls and features:
|
Caption text is used for short text passages such as form titles and the captions on hand print fill areas. Captions are always a single line of text with a maximum of 4,096 characters. All characters of a caption must be the same color and have the same font characteristics. Caption text has properties not available with paragraph text, they are:
|
Features common to both text types include:
- Font dialog
- Spell checking
- The Text Tool bar
- Document fonts dialog
- Missing fonts dialog
Default settings for text and caption text attributes such as font,
style, size, and line spacing are provided when Scantron DesignExpert
software is installed. You can change all of these attributes can be changed, as needed,
for individual text and caption text elements on your form. In addition, You can also change the defaults to suit your needs.
|
Text Attribute |
Text Type |
Default Setting at Installation |
Where to Modify the Default Setting |
|---|---|---|---|
|
Alignment |
Text |
Left |
Modify Paragraph dialog |
|
Baseline Shift |
Text |
None |
Modify Paragraph dialog |
|
Color |
Text, Caption Text |
Black |
Font dialog, Modify Text Box dialog |
|
Color |
Caption Text |
Black |
Modify Caption Text dialog |
|
Font |
Text, Caption Text |
Arial |
Font dialog |
|
Font style |
Text, Caption Text |
Regular |
Font dialog |
|
Horizontal Alignment |
Caption Text |
Center |
Modify Caption Text dialog |
|
Line Spacing - After Paragraphs |
Text |
Zero |
Modify Paragraph dialog |
|
Line Spacing - Between Lines |
Text |
Equals OMR response spacing: 5, 6, or 8 per inch |
Modify Paragraph dialog |
|
Margins
|
Text |
0.0 points |
Modify Text Box dialog |
|
Margins - Margins |
Caption Text |
0.0 points |
Modify Caption Text dialog |
|
Margins - Show margins |
Caption Text |
Unchecked |
Modify Caption Text dialog |
|
Overprint |
Caption Text |
Checked |
Modify Caption Text dialog |
|
Overprint |
Text |
Checked |
Modify Text Box dialog |
|
Paragraph Indentation
|
Text |
Zero |
Modify Paragraph dialog |
|
Rotation - Baseline |
Caption Text |
Zero Degrees |
Modify Caption Text dialog |
|
Rotation - Character |
Caption Text |
Zero Degrees |
Modify Caption Text dialog |
|
Screen |
Text, Caption Text |
100% |
Font dialog, Modify Text Box dialog |
|
Screen |
Caption Text |
100% |
Modify Caption Text dialog |
|
Show margins |
Text |
Unchecked |
Modify Text Box dialog |
|
Size |
Text, Caption Text |
10 pt. |
Font dialog |
|
Spacing - Inter -word |
Caption Text |
100% |
Modify Caption Text dialog |
|
Spacing - Inter-character |
Caption Text |
100% |
Modify Caption Text dialog |
|
Tabs - Alignment |
Text |
Left |
Modify Paragraph dialog |
|
Tabs - Tab Position |
Text |
None |
Modify Paragraph dialog |
|
Tabs - Units |
Text |
Equals OMR response spacing - 5, 6, or 8 per inch |
Modify Paragraph dialog |
|
Underline |
Text, Caption Text |
Unchecked |
Font dialog |
|
Vertical Alignment |
Caption Text |
Center |
Modify Caption Text dialog |
Scantron DesignExpert software has a Merge Text Style Control feature that enables you to control the style attributes of text printed from your merge database in addition to controlling it from the merge fields in your form. This feature can be used with merged text in both text and caption text fields.
Depending on the result you want, merge text style can be controlled by the placeholder on the form or by a tag in the database:
- To get the same text attributes for merged text on all forms, define text attributes in the placeholder on the form.
- To get different text attributes for merged text on each form, define text attributes in the database.
This feature is available with the MergePrint software utility in addition to the Scantron DesignExpert Merge Wizard.
When text style for a merge field is controlled by the merge field placeholder on your form, the appearance of text printed on every form is the same. For example, if a merge field on your form is defined as Times New Roman, 14 point, then text merge printed on every form for this field will be Times New Roman, 14 point:
| Text Attributes |
Merge Field Placeholder Examples |
Printed Text Examples |
|---|---|---|
|
Times New Roman, 14 point |
{Name} |
Allan Barnes |
|
Arial, 12 point, Bold |
{Name} |
Becky Colter |
|
Times New Roman, 16 point, Bold, Italic, Red, 50% |
{Name} |
Charles Davis |
See Modifying Text Boxes or Modifying Caption Text for details on setting text attributes on placeholders.
When text style for a merge field is controlled by a tag in the merge database, the appearance of text printed on each form can differ.
Text Style Control attributes include Bold, Italic, Underline, Font and Size, Color and Screen percentage:
|
Text Attributes |
Examples |
|---|---|
|
Bold |
Allan Barnes |
|
Italic |
Becky Colter |
|
Underline |
Charles Davis |
|
Font and Size |
Denise Edison |
|
Color and Screen Percentage |
Elizabeth Garman |
These controls can be applied singly or in any combination. For example,
|
Text Attributes |
Examples |
|---|---|
|
Bold, Italic |
Allan Barnes |
|
Italic, Underline |
Becky Colter |
|
Font and Size, Color and Screen Percentage |
Charles Davis |
|
Bold, Color and Screen Percentage |
Denise Edison |
NOTE: Merge field (placeholder) text attributes Bold, Italic, and Underline override text attribute tags in your database. For example, if your merge field is Bold, your printed text will be Bold even if the <Bold/> tag is not included in your database.
The following chart displays the available text attributes, the tag for each attribute, an example of how the tag is applied in the database for a merge field called "Name" and an example of what the printed results will be with the application of this tag. An explanation of tag formatting requirements follows.
|
Text Attribute |
Tag |
Database Example |
Printed Result |
|---|---|---|---|
|
None |
None |
Name |
Allan Barnes |
|
Bold |
<Bold/> |
<Bold/>Name |
Allan Barnes |
|
Italic |
<Italic/> |
<Italic/>Name |
Allan Barnes |
|
Underline |
<Underline/> |
<Underline/>Name |
Allan Barnes |
|
Font and Size |
<Font name: FontName1 size: FontSizeInPoints2/> |
<Font name: Times New Roman size: 16/>Name |
Allan Barnes |
|
Color and Screen percentage |
<Color index: ColorPaletteIndex3 screen: ScreenPercent4 /> |
<Color index: 2 screen: 100 />Name |
Allan Barnes |
|
Bold, Font and Size |
<Bold/><Font name: FontName size: FontSizeInPoints/> |
<Bold/><Font name: Times New Roman size: 16/>Name |
Allan Barnes |
|
Underline, Color and Screen percentage |
<Underline/><Color index: ColorPaletteIndex screen: ScreenPercent /> |
<Underline/><Color index: 2 screen: 100 />Name |
Allan Barnes |
|
|||
- Tags are case sensitive, as shown in the chart above.
- Tag syntax is as shown in the chart above.
If you need to print a tag that is included in your database, place the tag <Escape> before and after the tag to be printed. For example:
|
Database Example |
Printed Result |
|---|---|
|
<Bold/><Escape><Bold/><Escape> Name |
<Bold/> Allan Barnes |
- The Merge Wizard and the MergePrint Utility support Merge Text Style Control with all Scantron DesignExpert supported database types.
|
Database Type |
Merge Wizard |
MergePrint Utility |
|---|---|---|
|
Comma delimited (*.csv) text files |
Yes |
Yes |
|
Tab delimited (*.txt) text files |
Yes |
Yes |
|
Microsoft Access (*.mdb) files |
Yes |
Yes |
|
Microsoft Excel (*.xls) files |
Yes |
Yes |
TIP: See Merge Wizard Overview for additional information about Microsoft Excel database support, including our recommendation to convert Excel files to either comma separated or tab delimited text files.
Text and caption text box sizes are fixed in your design. If you are merge printing either type of text, make sure that the text box is large enough to fit the largest amount of text you expect to merge from your database. If the box is too small, the text that doesn’t fit will be truncated.
CAUTION: If you are merge printing caption text or paragraph text that will be read with the optional RealTime Character Recognition component of Scantron ScanTools Plus software, see ScanTools Help for font recommendations.
What's on the screen?
The Modify Caption Text dialog includes the following tabs:
-
 Margins
Define the distance from the edge of the caption text box to the caption text characters.
Use this element… …to… Margins Define the distance from each edge of the box to the text.
- Select a unit of measurement. The unit of measurement can be set in points, millimeters, inches, or fractions of an inch (1/5, 1/6, 1/8, and 1/10).
- Enter a value for each of the margins.
Show margins
Display a line that shows the margins within the text box.
Make current settings the default
Save the current values to be in effect when you create new text other text boxes.
-
Text Color
Define the color to be used for the caption text. All text for the caption will be set in this color.
Use this element… …to… Color
Set the color. The choices are selected from the list established when you created the document, including black and white.
Screen
Set the color screen. Screens are an economical way of adding color variety using a single-color process. They also enable you to add shading without using a different color. Select a value between 10% and 100%, in 10% increments (plus 15%). The lower the value, the lighter the color appears.
TIP: If you are using shading to create an underlay, use ‘none’ as the color. Any gradient of shade, or the color white, will be screened at 50%, and appear grayed out.
Overprint Indicate whether this text is overprint.
The default is for this box to be checked. This means that any graphic element you create will be printed on top of the element beneath it. The top element will not knock a hole in the bottom element.
CAUTION: Do Not Change this setting unless you are familiar with the complexities of color overprinting and color trapping. When you send your document to Scantron Print Services for printing, our graphic arts specialists will analyze your form and determine if the overprint setting for any element needs to be modified. If you are unfamiliar with this process, we will perform this function for you.
-
Scanning
Identify this caption as a barcode and set barcode scanning options.
Use this element… …to… Bar Code
Indicate that the caption text shape is to be treated as a bar code field when exporting the document to ScanTools software or when pre-printing the caption text shape using the merge printing feature.
- For Export to ScanTools, the caption text shape must be located on the top side of the sheet as scanned; for merge printing, the shape may be located on either side.
- Bar code type, location, and other attributes associated with your bar code field are not exported to ScanTools software. In your ScanTools application, Hardware Bar Code is selected by default. For software bar codes however, you must select Software Bar Code and then define the location and other bar code attributes.
The Bar Code checkbox is clear by default.
Field Name
Enter a unique name for the bar code data field. The name can have a maximum of 24 alphanumeric characters (a-z, 0-9). If you enter a name that is already used, you will receive a message telling you that "You must enter a unique field name."
TIP: We recommend you provide a meaningful field name so that later, if you use the Modify Field Attributes dialog, you can identify the field that this bar code is associated with. If you intend to use the Export to ScanTools feature, the field names are used. If you do not provide a meaningful name, Scantron DesignExpert uses a default name: Field#, where # is an assigned numeric value based on all fields currently defined for all documents currently open. This naming convention can lead to non-consecutive numbers being assigned to fields in a document, and may not be optimal when you go to the Modify Field Attributes dialog.
Number of Characters
Indicate the number of characters ScanTools should expect to read in the bar code field. The number of characters does not include the bar code start and stop characters.
This control is blank by default. If you check bar code, you must enter a numeric value greater than zero and no greater than 64 before exiting the dialog.
-
Merge
Define the options if this caption will contain data that will be merged onto the form from a database.
Use this element… …to… Merge Field Type
Define the type of data that will be printed in the caption text variable print placeholder area when you use the Merge Wizard. Choices are:
- None
- Print Variable Text
- Print Serial Number
- Print Record Number
This caption text box is NOT used for printing variable text when using the merge wizard. The characters you have entered in the Enter Caption Text dialog are what will be printed when you perform a print job using the Print dialog.
Prints text characters from a field in the database file. Data in the database field must be alphanumeric ASCII characters, no special characters are supported.
Prints a serial number you can define in the Merge Wizard.
Prints the record number from the database file. If you select this, the Setup Record Numbers step appears later when you use the Merge Wizard.
Merge Field Name
Enter the variable name for this caption text variable print field. This name can be used later in the Merge Wizard to link this variable print field to a database field name. If you use the same name as the database field name, you will be able to automatically match this field with the database field when you use the Merge Wizard.
When you first enter the Merge tab, the text that is currently defined as the actual caption text automatically is displayed in the Merge Field Name area. You can accept it or change it, using a maximum of 32 alphanumeric characters.
The name you enter here is displayed in the caption text element enclosed in braces or brackets, depending on which merge field type you select. This enables you to easily identify it as a merge field, and you can see the variable name you have assigned to it:
- Variable text type is enclosed in braces: for example {patient name}.
- Serial number type is enclosed in square brackets: for example [serial number].
- Record number type is enclosed in angle brackets: for example <record number>.
Bar Code Start and Stop Characters
Enter the Start and Stop codes required by the bar code symbol type you are using. This option is active only if you enabled bar codes on the Scanning tab (above).
Whether printing a bar code of variable data from a database, a bar code serial number, or a bar code record number, Scantron DesignExpert automatically adds the bar code start and stop characters when the bar code is printed. For example, Code 39 bar code uses an asterisk (*) for both the start and stop code. If you plan to use a Code 39 bar code, enter "*" for the start and stop code. Code 39 bar code fonts are installed with Scantron DesignExpert software.
Bar code start and stop codes vary by symbology (Code 39, Interleaved 2 of 5, etc.) and bar code fonts vary in how they encode start and stop codes. This means that in order to obtain correct bar codes, you must identify the start and stop codes for both the specific bar code symbol and the bar code font. The documentation supplied with your bar code font should explain how start and stop codes are encoded for each bar code symbology.
Scantron
scanner bar code compatibility
The optional bar code reader on Scantron OMR scanners is capable of reading a variety of bar code symbologies:
Symbology
Character Set
Code 39
Alphanumeric plus special characters dash (-), period (.), slash (/), dollar ($), percent (%), plus (+), and space (SP)
Code 128
Alphanumeric plus most special characters
EAN 8 & 13
Numeric
Interleaved 2 of 5
Numeric
UPC A & E
Numeric
Codabar
Numeric plus special characters dash (-), period (.), slash (/), dollar ($), percent (%), plus (+), and colon (:)
Scantron
bar code symbology recommendations
- Code 39 is simple to use and an excellent choice for encoding alphanumeric information.
- Interleaved 2 of 5 is an excellent choice when only numeric information will be encoded. It takes less space than Code 39.
- Code 128 is a good choice when special characters must be encoded.
- EAN 8 & 13, UPC A & E, and Codabar are more specialized bar code symbologies designed for specific industries. Unless your industry requires they be used, we recommend use of Code 39, Interleaved 2 of 5, and Code 128.
NOTE: Code 39 bar code fonts, including WASP 39 L, WASP 39 M, WASP 39 H, WASP 39 LC, WASP 39 MC, and WASP 39 HC, are installed with Scantron DesignExpert software.
Scantron
bar code specifications
Bar code requirements and capabilities vary by scanner. Before bar coding any form, we recommend you read bar code requirements published for your scanner.
-
Rotation and Spacing
Specify the rotation (angle) of the caption text, the spacing between letters and words in the caption, and the alignment of the text within the caption text box.
Use this element… …to… Rotation (degrees)
Define the precise degree of rotation for the selected box.
Enter a positive or negative value to define how many degrees to rotate the shape:
- Positive numbers (no plus sign (+) required) rotate the shape counterclockwise
- Negative numbers (which do require a minus sign ( - )) rotate the shape clockwise
For example, selecting 90 degrees rotates the shape a quarter turn to the left (counterclockwise). Selecting -90 degrees rotates the shape a quarter turn to the right (clockwise).
All rotation calculations are made from the original position of the shape, before it was rotated. If you perform more than one rotation operation, the shape is rotated according to the original position, NOT from the coordinates of the most recent rotation position.
You can rotate the entire text line, the letters themselves, or both.
Use this element…
…to…
Baseline
Define how much to rotate the baseline of the entire caption. Enter a value in the range -360 to 360. This can save space on your form, because the captions can be rotated to take up no more than the width of a response bubble.
Show a sample
The following sample shows caption text baseline rotated 15 degrees. This sample does not use Character rotation, see the description below.
You can also rotate the caption baseline using the mouse or by right-clicking and selecting Rotate.
Character
Use this value to define how much to rotate the individual characters of the entire caption. Enter a value in the range -360 to 360. This can make the text easier to read; for example if you rotated the baseline to vertical, you could rotate the letters to read vertically, so your respondents do not have to tilt their heads to read the caption.
Show a sample
The following sample shows caption text characters rotated 25 degrees, with no baseline rotation.
Spacing (percent)
Set the letter and word spacing for the caption.
Use this element…
…to…
Inter-char
Defines the distance from the center of one character to the center of the next character. 100 percent (the default value) means standard spacing for the font. Values less than 100 bring the words closer together. Values greater than 100 move the words further apart. Value range: 50 - 500 %. Inter-word
Defines the distance from the end of one word to the beginning of the next word. 100 percent (the default value) means standard spacing for the font. Values less than 100 bring the words closer together. Values greater than 100 move the words further apart. Value range: 50 - 500 %. Horizontal Alignment
Position the caption text characters within the caption text box, from left to right. Choices are: Left, Center, Right.
Vertical Alignment
Position the caption text characters within the caption text box, from top to bottom. Choice are: Top, Center, Bottom.
Make current settings the default
Save the current values to be in effect when you create new captions in this or other caption text boxes.
-
Position and Sizing
Change the position of the caption text box or lock its position. You can also drag the box to a new position, but this tab gives you a little more precision in placement.
NOTE: You cannot change the position or lock for multiple shapes. If you have more than one shape selected, these options are disabled.
Use this element… …to… Lock Lock and unlock the box.
Use this option… …to… Lock Anchor the selected shape to the current location on the form, and prevent it from being cut, deleted, moved, or resized. If you want to change or delete the shape, you need to first unlock it.
Lock Vertical Anchor the selected shape vertically so you can only move or resize the shape horizontally.
Lock Horizontal Anchor the selected shape horizontally so you can only move or resize the shape vertically.
Unlock Unlock the selected shape so you can cut, delete, move, or resize it in any direction.
You can also lock or unlock the box position by right-clicking. See Shape Pop-up Menu for details.
Position & Size Define the precise location and size of the shape. The alignment grid is based on 0 horizontal and 0 vertical as the upper left-hand corner of the document workspace.
- Select a unit of measurement. The unit of measurement can be set in points, millimeters, inches, or fractions of an inch (1/5, 1/6, 1/8, and 1/10).
- Enter Horz and Vert values to define the horizontal and vertical coordinates of the upper left corner of the shape relative to the background alignment grid.
- Enter Width and Height values to define the size of the shape.
You can also move and resize the shape by dragging it with the mouse.
How do I…
- Select Tools > Caption or click
 .
. - Place the mouse pointer where you want the caption box to begin, click and drag the mouse pointer to where you want the caption box to end, then release the button.
- Enter the desired text and click Apply and/or OK.
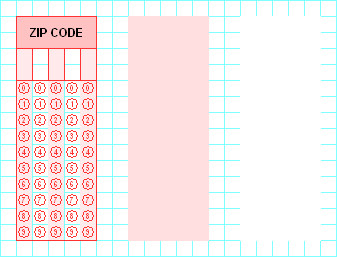
You may want to create the illusion that an element of your design, such as a box or response grid, is floating and casting a shadow. This effect is called a "drop shadow."
|
Without
|
With
|
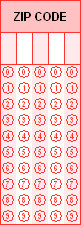
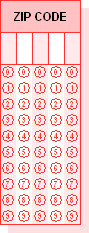
Scantron DesignExpert does not have a drop shadow tool but it is relatively easy for you to create your own simple drop shadow if you need one.
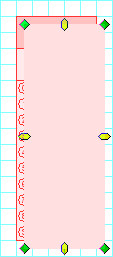
- Create or select an element.
- Draw a box of the same size as the element.
- Use Modify Box to create your "shadow" by changing the box Stroke and Fill to a screen percentage such as 15%.
- Duplicate this box and use Modify Box to change the second box Stroke and Fill to Solid Style and White Color.
- Drag the "white" box on top of your element (an OMR response grid in this case) then move it to the graphic layer behind the element (right-click the box, then choose Move to Back).
- Drag the 15% screened box on top of your element and offset down and to the right by half a response grid space. Then, move it to the graphic layer behind the element.
- Select all of the elements in your finished grid and Group them so that they stay together when moved on the workspace.
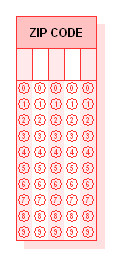
Your element is complete with drop shadow. We suggest you experiment with other shapes, screen percentages, and colors. And, be sure to add it to your Shape Library if you will use it with other form designs.