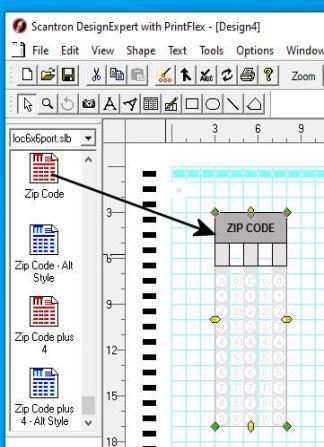
Working with the Shape Library
A shape library is a Scantron DesignExpert
software file that contains commonly used design elements such as graphics,
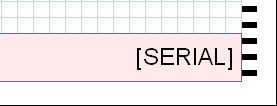
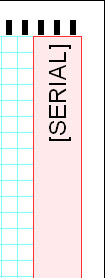
text, response grids, and litho-code![]() An optional, binary-coded serial number unique to every form, usually accompanied by a human-readable, decimal number equivalent. The Litho-code is printed on press with a mechanical numbering machine. Standard Litho-code grids are available in the Shape Library.You can also place a serial number in a Litho-code grid with your laser printer and the merge printing feature. See Also consecutive numbering grids. You can drag these shapes from
the shape library to your document, saving you time and helping
ensure that your design elements are consistent within a form and across
multiple forms.
An optional, binary-coded serial number unique to every form, usually accompanied by a human-readable, decimal number equivalent. The Litho-code is printed on press with a mechanical numbering machine. Standard Litho-code grids are available in the Shape Library.You can also place a serial number in a Litho-code grid with your laser printer and the merge printing feature. See Also consecutive numbering grids. You can drag these shapes from
the shape library to your document, saving you time and helping
ensure that your design elements are consistent within a form and across
multiple forms.
NOTE: Shape library elements are often grouped. You may need to ungroup them to edit the individual elements.
Litho-coding is a technique for printing a unique, scanner-readable, serial number on an OMR form. It is most commonly used to match-number the first and last sheet of a scannable booklet so that the integrity of the booklet can more easily be checked by ScanTools software. It can also be used for other purposes. A litho-code is a binary number that is applied via a mechanical numbering machine on a Scantron Print Services printing press. A Litho-code Grid is a place on an OMR form that is formatted for this mechanical numbering. If desired, this same grid can be laser merge printed on your laser printer.
This standard Litho-code grid format is designed for numbering machine application on a printing press. It is available in the Shape Library and can also be used for laser printed Litho-codes.
Click a label on the example below to learn more about that area:

We recommend using a standard Litho-code grid from the Shape Library.
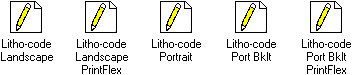
- OMR forms - Use Litho-code Port Bklt, Litho-code Port Bklt PrintFlex, Litho-code Landscape, or Litho-code Landscape PrintFlex. PrintFlex in the element name indicates that the grid is for laser printer use.
- OMR Laser Printer forms - Use Litho-code Portrait or Litho-code Landscape.
- We recommend that a Litho-code grid not be placed on the first or last timing mark. This placement may conflict with ScanTools software form ID mark detection. Litho-code placement on other timing marks is acceptable.
- For Booklet Designs
- Litho-code grids are usually placed on the first and last pages of 4-page folders and saddle-stitched booklets. For example, a 16 page book would have Litho-code grids on pages 1 and 16. Place the Litho-code grid on the same timing mark on each page.
- For 8-page glued booklet construction, Litho-code grids are usually placed on the bottom of pages 1 and 8 and on the top of pages 4 and 5.
- Booklet pages are usually portrait orientation.
- For Printing
- At Scantron Print Services, black marks are included in the first and the last six response positions.
- On your laser printer, the black marks are not required and are not included in the standard Litho-code grid from the Shape Library.
If you merge print your Litho-code grids with your laser printer, we recommend you use the standard Shape Library Litho-code grids. However, you can design your own grids to take advantage of the laser printer’s greater flexibility. This includes:
- 5, 6, or 8 per inch response spacing compared to 6 per inch only for the standard grids.
- Litho-code grid parallel to the timing track compared to perpendicular to the timing track only for the standard grids.
Working with the Shape Library
The Shape Library can be displayed on the workspace or hidden from view.
- To display the Shape Library, select View> Shape Library. The Shape Library appears in the workspace and a check mark appears beside Shape Library on the View menu.
- To hide the Shape Library, select View > Shape Library. The Shape Library disappears from the workspace and the check mark beside Shape Library on the View menu is removed.
You can dock the Shape Library on the left-hand or right-hand side of the workspace or you can float it at a location of your choice.
|
To dock the shape library do either of the following:
|
To float the shape library do either of the following:
|
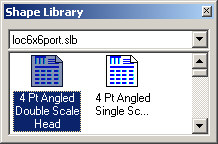
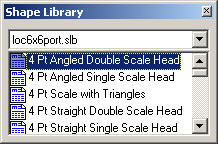
You can use Large or Small icons to display the library elements.
To change the element display, do one of the following:
- Right-click the Shape Library and select Shape Library > Large Icon or Small Icon
- Select File > Shape Library > Large Icon or Small Icon.
Scantron DesignExpert includes several standard Shape Library files. Each standard Shape Library is designed for a specific response spacing (6x5, 6x6, or 6X8), page orientation (landscape or portrait), and form type (OMR or Laser Printer Only). In addition, a default Shape Library is available for use with any design format. When you create a new document, select and open an appropriate standard Shape Library for your design.
- City grids
- Date grids
- Leader dots
- Litho-code grids
- Marking instructions
- Name grids
- Phone number grids
- Social Security number grids
- State grids
- Street address grids
- Survey response scales
- Text for surveys and tests
- Zip code grids
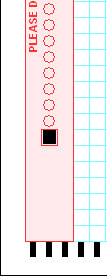
NOTE: The example OMR responses in the Marking Instructions are drawn with the Ellipse Tool or the Box Tool. The Response Tool is not used for this purpose since the response grids created will generate a scannable field that will be exported to ScanTools. This can result in unnecessary data capture or, if the timing marks have been removed from the form, an "Invalid timing mark" error.
Shape Library files are named to generally describe the format they are to be used with. For example loc6x6port.slb is designed for local laser printing on stock form 265914 (or on plain paper with the PrintFlex option), 6x6 response spacing, and portrait page orientation. The .slb file extension is reserved for shape library files in Scantron DesignExpert software.
|
Shape Library File Name |
OMR Response Spacing |
Page Orientation |
|---|---|---|
|
6x5land.slb |
6x5 |
Landscape |
|
6x5port.slb |
6x5 |
Portrait |
|
6x6land.slb |
6x6 |
Landscape |
|
6x6port.slb |
6x6 |
Portrait |
|
6x8land.slb |
6x8 |
Landscape |
|
6x8port.slb |
6x8 |
Portrait |
|
default.slb |
All |
All |
|
Shape Library File Name |
OMR Response Spacing |
Page Orientation |
Stock Form |
|---|---|---|---|
|
loc6x5land.slb |
6x5 |
Landscape |
103188 |
|
loc6x5port.slb |
6x5 |
Portrait |
103188 |
|
loc6x6land.slb |
6x6 |
Landscape |
265914 |
|
loc6x6port.slb |
6x6 |
Portrait |
265914 |
|
default.slb |
All |
All |
All |
NOTE: You can use plain paper instead of a stock form if you have installed the PrintFlex option.
|
Shape Library File Name |
Page Orientation |
|---|---|
|
default.slb |
All |
How do I…
Drag a shape from the library to the document workspace. You may now place it or adjust settings for its shapes. See any of the following for details on how to edit shapes:
- Modifying Boxes
- Modifying Caption Text
- Modifying Ellipses
- Modifying Graphics
- Modifying Hand Print Areas
- Modifying Lines
- Modifying Paragraphs
- Modifying Polygons
- Modifying Response Grids
- Modifying Text Boxes
NOTE: Shape library elements are often grouped. You may need to ungroup them to edit the individual elements.
- Select the appropriate Shape Library for your form.
- Drag the appropriate litho code shape to the workspace.
- Position the Litho-code Grid so that it is aligned with the timing track (see examples below). This will depend on the page you are litho-coding and the orientation of your form.

Select a library from the drop-down list at the top of the Shape Library.

- Select the library that should contain your new element.
- Select a graphic, text, response grid, or group of related objects on the workspace.
- Select File > Shape Library > Add Element to Library.
- Select an element icon.
- Enter an element name.
- Enter an element description.
- Click OK.
- Select File > Shape Library > Save or Save As.
TIP: You may be able to save time by using an existing element name and description as a template for the new element. For example, for a new element "Vendor Code," use the down arrow to display the names already used for other elements. Select an existing element "Employee Code" and then modify the existing name and description to fit your new element.
TIP: We recommend that you save your customized standard Shape Library with a different file name. Standard Shape Libraries provided with Scantron DesignExpert software are replaced during software installation. If you install a new version of the software or must reinstall the current version for some reason, elements you have customized in standard Shape Libraries will no longer be available.
- Right-click a shape in the library.
- Select Modify Element Description.
- Make any changes to the icon, name, or description.
- Click OK.
- Select File > Shape Library > Save or Save As.
TIP: We recommend that you save your customized standard Shape Library with a different file name. Standard Shape Libraries provided with Scantron DesignExpert software are replaced during software installation. If you install a new version of the software or must reinstall the current version for some reason, elements you have customized in standard Shape Libraries will no longer be available.
CAUTION: Deleting a shape from the library permanently removes the shape. You will not be able to use this shape in future documents. Any documents already containing this shape still contain it, although it is no longer in the library.
- Right-click a shape in the library.
- Select Delete Element from Library.
- At the prompt, confirm your deletion.
- Select File > Shape Library > Save or Save As.
TIP: If you simply do not want this shape available for this form, we strongly recommend selecting Save As and creating a copy of the library.
- Select File > Shape Library > New. An empty Shape Library with the file name Untitled.slb is displayed.
- Add elements to the library as described under …add a new shape to a library, above.
- Select File > Shape > Save As…. We suggest using a file name that is different from the standard Shape Library files.